Using in the classroom
Fundamentals
- RapidTyping is only installed on the teacher's computer.
- The teacher's computer can be a server or workstation.
- Students run an executable file from a network drive over the local network Wi-Fi or Ethernet.
- The teacher creates student accounts.
- Student accounts are stored on the teacher's computer.
- The teacher can monitor the process of learning/testing of students on his/her computer.
1. Installation
Portable version
Unpack the downloaded file RapidTyping_Portable_5.x.zip into any network folder where your students can have access to it over the local network.
Setup version
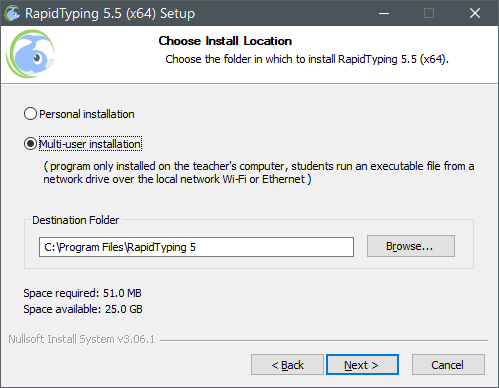
On the Choose Install Location screen, you need to check the Multi-user installation and choose any network folder where your students can have access to it over the local network.

2. Creating user accounts in RapidTyping
After installing the program, you need to create student accounts.
There are two ways to create student accounts:
- Use the Add new students dialog box. This method can be useful for creating a small number of groups.
- Use a command line to export a large number of groups in the XML format.
An account with administrator privileges is created automatically when you run RapidTyping for the first time. The difference between a student account and a teacher account is described in the section Student statistics.
3. The final step
After you've created accounts for your students, you can:
- Create a shortcut to run the program on the student's computers (shortcut to RapidTyping.exe, in the folder where you installed the program).
- Inform the users of their passwords.
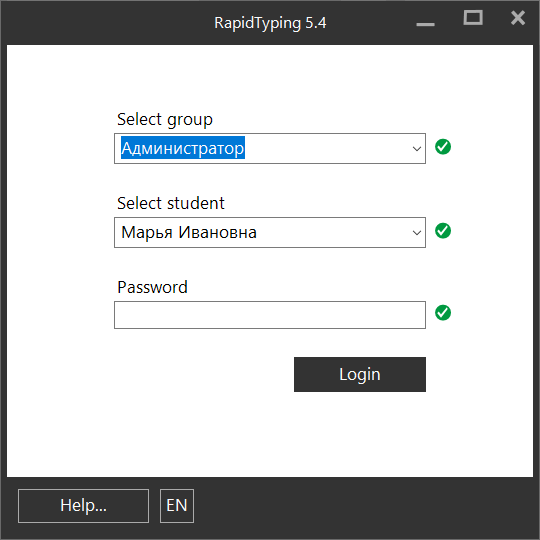
When a student clicks an icon, a window Login - Rapidtyping appears.

In this window, the student should select his/her Group, Name, Password, and begin the first lesson.
See also:
Rapid Typing Reviews
good

