User experience

Once you've configured settings in Wizard, the Main window of the program will appear as shown below:
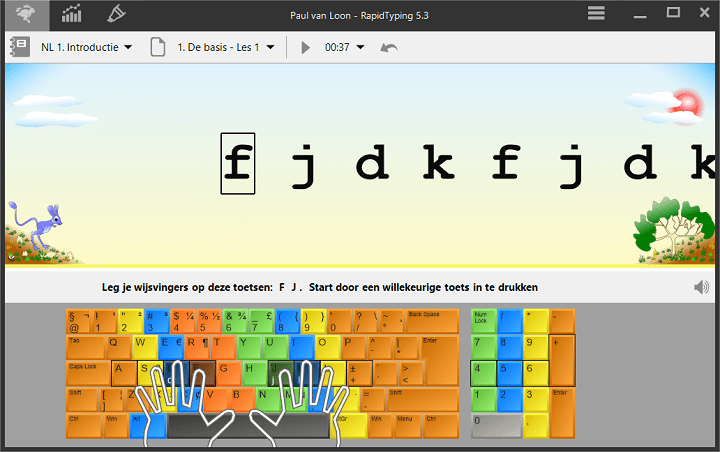
Main window is composed of the following controls:

  • Three big tab-buttons in the top-left corner are used for switching between basic program modes: Current lesson, Student statistics and Lesson editor.
  • In the text area in center of a window, the text to be typed is displayed.
  • Toolbar, in the top of the window, lets you select the current course and lesson, and customise the main program options. Lesson Control section allows you to Start / Suspend the current lesson, go back to the beginning and see the current speed, accuracy and remaining or elapsed lesson time in a real time.
  • Status bar, in the bottom, includes tips for the current lesson, progress bars: Lesson length, Metronome and the sound volume.
  • Virtual keyboard will help you to learn touch typing with all ten fingers. You can customise its options in the Keyboard options.
Notes

The appearence the all items in Main window is customised for each course in the Course Options.

When you're quite familiar with the RapidTyping interface, learn How to begin lessons. Don't forget to check out shortcuts - they'll make your interaction with RapidTyping even quicker.

Main options

To access RapidTyping options, click Options (in the top-right corner of the RapidTyping window), alternatively you can press Ctrl+O shortcut. The menu will appear as shown in the picture below.
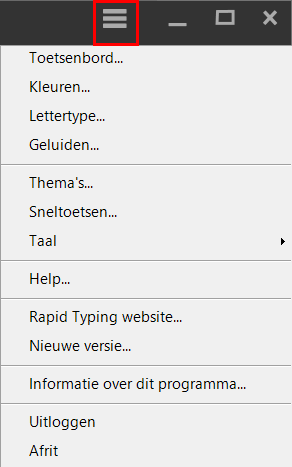
«Main options» menu

Notes

You can always read this manual by clicking the Help in this menu, alternatively you can press F1 shortcut

Keyboard options

Here you can to choose keyboard that best matches your physical keyboard, look at the keyboard to see the changes.
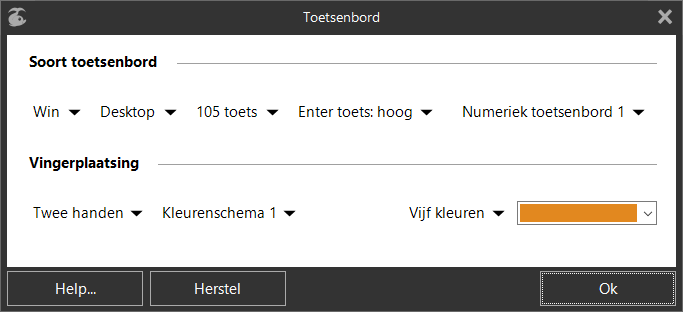
«Keyboard» dialog box

  • Select Windows or Mac keyboard.
  • Select the Keyboard type, that you have on your PC:
    • desktop
    • laptop
    • pocket
    • tablet
  • Select the Layout type
    • 104 keys (standard layout)
    • 105 keys (European layouts)
    • 106 keys (Korean layout)
    • 107 keys (Brazilian ABNT)
    • 109 keys (Japanese)
  • Choose Enter key type and Numeric pad type, that matches your physical keyboard.

Choose the scheme of Fingers position for:

  • two hands
  • left hand
  • right hand

and scheme colours.

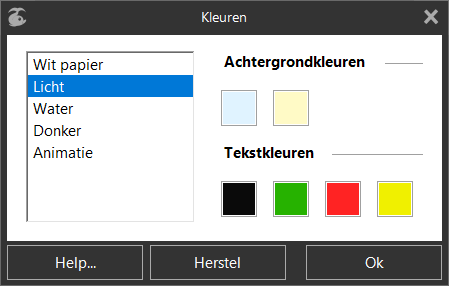
Background and text colour

In this dialog box, you can:

  • custom the background and text lesson colours
  • select the lesson background pictures or background animation.

«Background and text colour» dialog box

By default, RapidTyping has the following text colours settings:

  • basic text colour - black
  • correct type - green
  • error type - red
  • keystroke slowdown - yellow
Notes

Also these colours are used in the virtual keyboard, statistics diagrams and the Results window for marking good and bad values.

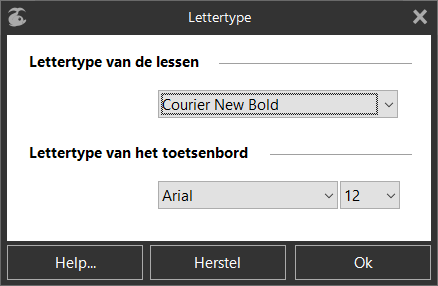
Font options

In this dialog box, you can specify:

  • the font for a Lesson ( the font size for the lesson you can specify in the Course options)
  • the font and font size for the Virtual keyboard.

«Font» dialog box

Notes

Make sure the font you use contains all the characters of the language, it is chosen for. Sometimes even the Euro-sign is missing in fonts. Because of that we recommend you use fonts that are shipped with your operating system or with office-suites.

Sound options

In this dialog box, you can configure and test sound effects for various actions in the program.
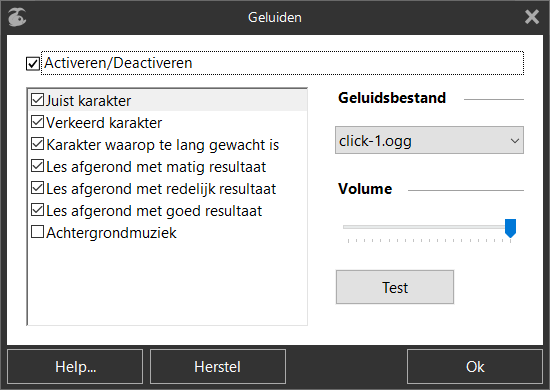
  • Just select the action in the left list and then choose the sound, adjust its volume with the slider and then click the Test button to check it out.
  • You can also enable or disable a sound for current action by means of the Enable / Disable checkbox.

«Sound» dialog box

Themes options

In this dialog box, you can configure:
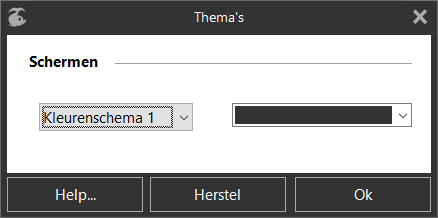
  • the colour of the RapidTyping Windows (colours are grouped into Schemes)

«Themes» dialog box


Shortcut options

In this dialog box, you can see RapidTyping's keyboard shortcuts bound to various Commands. To change a shortcut, select the corresponding Command from the list, put your cursor in the Customise field and then press the keys that you want to bind.

If a shortcut that you've selected is already in use, the Shortcut currently used by field will notify you about it. In this case, you'll have to either unbind this shortcut (by clicking the Remove button) or choose another one.
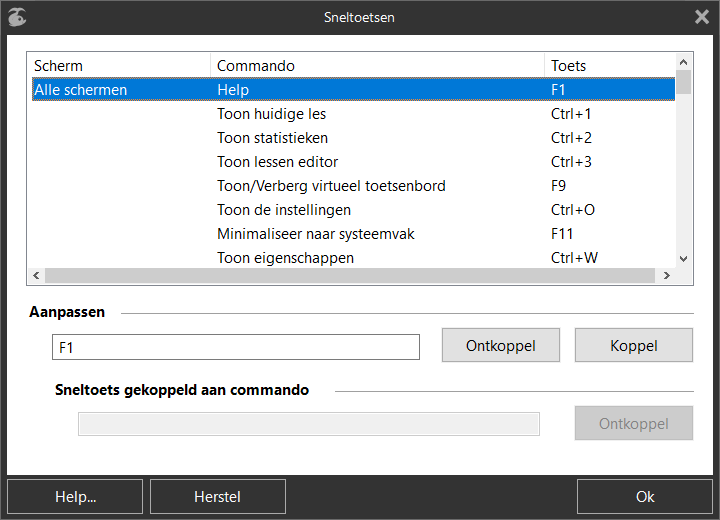
«Shortcuts» dialog box

Program language

In this sub-menu, you can choose the interface language of RapidTyping by clicking the corresponding language.
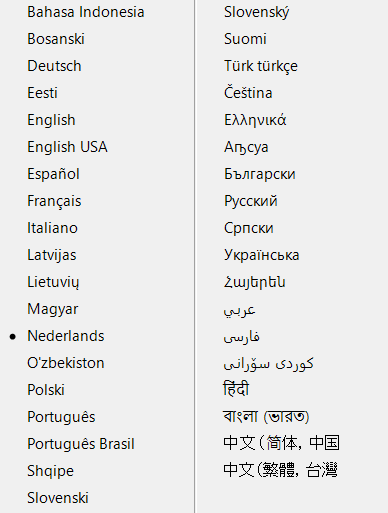
«Program language» menu

Notes

Here you can select the program interface language, for choosing lesson/keyboard language use the Course menu, in the top-left corner.

See also:

Site search